Dental Photography
How to remove saliva and blood from dental photos?
Gabriel Gimenez · Published on September 19, 2026
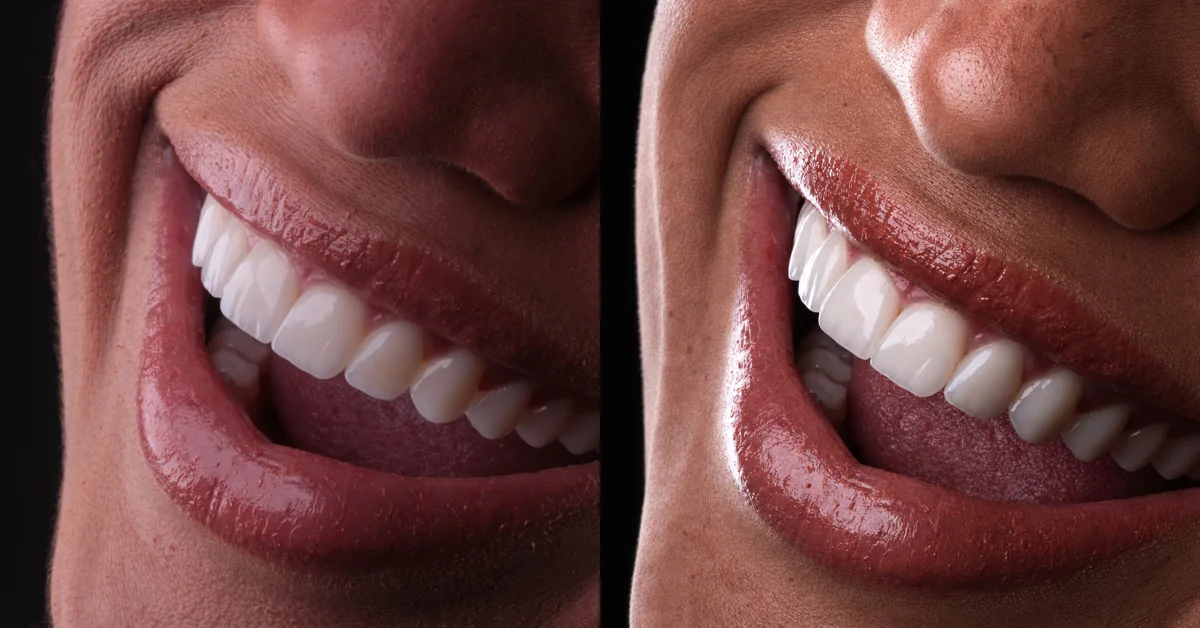
Saliva and blood leave the photo in two ways: prevention at capture time, with isolation, suction, and drying, and editing afterward, with an AI tool that removes those artifacts without touching the anatomy. For marketing and portfolio photos, editing solves in seconds what would otherwise require reshooting the whole session. For clinical documentation, the right move is to photograph a clean field and keep the original file.
In practice, the workflow I recommend is: isolate and dry the field before shooting, take the best photo you can, and use editing only for what slipped through. A saliva strand in the corner, blood residue near the gumline, foam on the retractor: those small artifacts disappear with AI without touching the tooth. Heavy bleeding covering the gingival margin or an out-of-focus shot cannot be saved by editing, so reshoot those.
Below I break down when each path makes sense, the step-by-step I use at dentraw LAB, and the ethical and clinical limits of this kind of editing.
Why do saliva and blood show up so much in dental photos?
Because the mouth is a wet environment working against photography. The better the lighting and the closer the shot, the more visible every strand of saliva reflecting the flash becomes. And in procedures like veneer prep, scaling, or surgery, bleeding is part of the clinical scene, even with good isolation.
The three offenders I see most in photos dentists send us at dentraw LAB:
- Saliva strands between the lips or between the tooth and the retractor, which turn into bright lines under the flash.
- Blood residue on the gingival margin after prep, impression, or scaling.
- Foam and droplets on the intraoral mirror or retractors, which dirty the framing.
None of the three is the dentist's fault. It is physics and biology. The mistake is publishing or presenting the photo with them in it.
When should you edit and when should you reshoot?
The rule I use is simple: editing cleans superficial artifacts, it does not rebuild lost information.
| Situation | Recommended path |
|---|---|
| Saliva strand in the corner of the image | AI editing |
| Spot of blood on the gingival margin | AI editing |
| Foam on the retractor or mirror | AI editing |
| Bleeding covering the tooth or margin | Reshoot after hemostasis |
| Blurry or dark photo | Reshoot |
| Photo for records or clinical documentation | Keep the original, no editing |
| Flash glare blowing out the enamel | Reshoot with a diffuser or change the angle |
I learned this the hard way. In the early days of dentraw LAB, I was testing photo enhancement on real cases dentists sent us, and I tried to save an impression photo where blood covered half the prep. The AI filled the region with generic texture and the result did not represent the case. Since then, our internal guidance, and what we tell users, is this: if the AI would have to invent anatomy, the right photo is a new one.
How do you remove saliva and blood with AI at dentraw LAB?
The workflow inside dentraw LAB is straightforward and takes seconds of processing:
- Upload the original photo to the platform, ideally at the highest resolution you have.
- Use the clinical photo enhancement tool, which removes saliva, blood, foam, and mild glare, while also correcting exposure and sharpness.
- Compare before and after side by side to confirm that anatomy, color, and texture were preserved.
- Export and use the clean version in your carousel, transformation video, or patient presentation.
- Keep the original file in the patient record, unedited.
Pricing is per generation: a single image costs R$3.90, and if you edit photos every week, the subscription usually pays off because it allows constant use without counting credits. I broke down the full pricing logic in the article about how much dentraw LAB costs.
What are the ethical limits of this kind of editing?
The line between legitimate cleanup and misleading manipulation is anatomy. Removing saliva, blood, foam, and glare is image cleanup: you take out what is an accident of the scene, not what is the case. Changing tooth shape, gingival margin position, result color, or removing a clinical defect that actually exists is a different story, and it can qualify as misleading advertising.
Two practical precautions:
- Always keep the original, unedited file linked to the patient's record.
- For marketing use, check your current local regulations on dental advertising and the use of patient images, including written consent.
The mental rule I use: if the patient or a colleague looked at the original and the edited version side by side, they should recognize the same case, just cleaner. If anyone could think it is a different tooth, the edit went too far.
How do you avoid saliva and blood at capture time?
The best edit is the one you never need. The capture protocol that reduces artifacts to a minimum:
- Isolate the field with retractors and, when possible, a rubber dam for documentation shots.
- Dry the teeth with air immediately before the click, not before adjusting the camera.
- Use suction during the procedure and take the photo right after hemostasis.
- Clean the intraoral mirror between each photo sequence, a dirty mirror ruins the whole series.
- Work with a flash diffuser or side lighting to reduce glare on wet surfaces.
- Take more photos than you need: saliva shows up irregularly, and out of six shots from the same angle, one usually comes out clean.
Even following all of this, some artifact always slips through, especially in surgical procedure photos. That is what the editing step is for, and it is why the two things complement each other instead of competing.
FAQ
Is it ethical to remove saliva and blood from dental photos? For marketing and portfolio use, removing artifacts like saliva, blood, and foam is a common image cleanup practice, as long as anatomy and the clinical result are not altered. For records and clinical documentation, keep the original file. If you are unsure about advertising rules, check your local regulations.
Does AI editing change the shape of the tooth or gums? A good tool only removes superficial elements, like saliva, blood, and glare, while preserving anatomy, color, and texture. At dentraw LAB, that is exactly the goal of photo enhancement: clean the image without redrawing the case.
When should I reshoot instead of editing? When bleeding covers important structures, when focus is off, or when the photo is for clinical documentation. Editing fixes superficial artifacts, not capture errors.
Can you remove saliva from photos taken with a phone? Yes. Phone photos with good lighting and focus respond very well to AI editing. What limits the result is a blurry or dark photo, not the device itself.
How long does it take to clean a photo with dentraw LAB? The generation process takes seconds. In practice, what takes the most time is choosing which photos from the case are worth editing, not the editing itself.
If you have a case ready to publish and the photos picked up saliva or blood along the way, start now with a free 3-day trial and see the clean version of your own photo.
Related articles
Frequently asked questions
Is it ethical to remove saliva and blood from dental photos?
For marketing and portfolio use, removing artifacts like saliva, blood, and foam is a common image cleanup practice, as long as anatomy and the clinical result are not altered. For records and clinical documentation, keep the original file. If you are unsure about advertising rules, check your local regulations.
Does AI editing change the shape of the tooth or gums?
A good tool only removes superficial elements, like saliva, blood, and glare, while preserving anatomy, color, and texture. At dentraw LAB, that is exactly the goal of photo enhancement: clean the image without redrawing the case.
When should I reshoot instead of editing?
When bleeding covers important structures, when focus is off, or when the photo is for clinical documentation. Editing fixes superficial artifacts, not capture errors.
Can you remove saliva from photos taken with a phone?
Yes. Phone photos with good lighting and focus respond very well to AI editing. What limits the result is a blurry or dark photo, not the device itself.
How long does it take to clean a photo with dentraw LAB?
The generation process takes seconds. In practice, what takes the most time is choosing which photos from the case are worth editing, not the editing itself.